Aurora Out My Window

I see the aurora for the first time — well, sort of — right from the comfort of my own home.

If you pay attention at all to science-related news, you are probably aware that the sun is near the peak of its 11-year solar activity cycle, with lots of sunspots and coronal mass ejections. This has made aurora a lot more visible than usual, making it possibly for people to see it as far south as Arizona and Texas.

I don’t live that far south. I live in north central Washington state. Opportunities to view the aurora abound at my home — which has a perfectly unobstructed view to the north, right to the horizon — but I’ve spent much of the past two years away from home. Ironically, from June through August, I was traveling at latitudes farther north than where my home is, but I just didn’t see the aurora on any nights I might have. I could blame weather (clouds), ambient lighting (being near a city), or a lack of clear view to the north (from trees or mountains).

But when I got home, I became determined to see the aurora from my home.

The Science of the Aurora

I would be remiss if I did not mention the excellent Space Weather and Aurora Dashboard pages constantly updated by the National Oceanic and Atmospheric Administration (NOAA). It provides a wealth of information about the aurora, from forecasts and current conditions to basic and detailed information about what causes the aurora.

For example, NOAA’s Aurora Tutorial page starts its explanation of the aurora like this:

The aurora is formed from interactions between the solar wind streaming out from the sun and Earth’s protective magnetic field, or magnetosphere. The aurora is one manifestation of geomagnetic activity or geomagnetic storms. As the solar wind increases in speed and the interplanetary magnetic field embedded in the solar wind turns southward, the geomagnetic activity will increase and the aurora will become brighter, more active, and move further from the poles. Even moderate solar wind creates aurora so there is usually a weak aurora somewhere even when there isn’t a big geomagnetic storm.

There are two types of solar events that create big geomagnetic storms that are associated with bright and active aurora. The first is a Coronal Mass Ejection, or CME, which can be described as a billion tons of plasma ejected from the sun, traveling at a million miles per hour. When a CME arrives at Earth, it can produce some of the biggest geomagnetic storms and thus, some of the brightest and most active auroras that extend furthest toward the equator. The second solar event that can create moderate sized geomagnetic storms is called a coronal hole. Coronal holes are the source of high speed solar wind streams. When these high speed streams arrive at Earth, they can produce active auroras. But the geomagnetic storms and aurora associated with coronal holes is less active than those from the biggest and fastest CME’s.

Later on that page, it explains what causes the individual colors you might see. This is a great place to start if you want to learn more about how the aurora forms and when viewing is best.

Forecasts < Actual Conditions

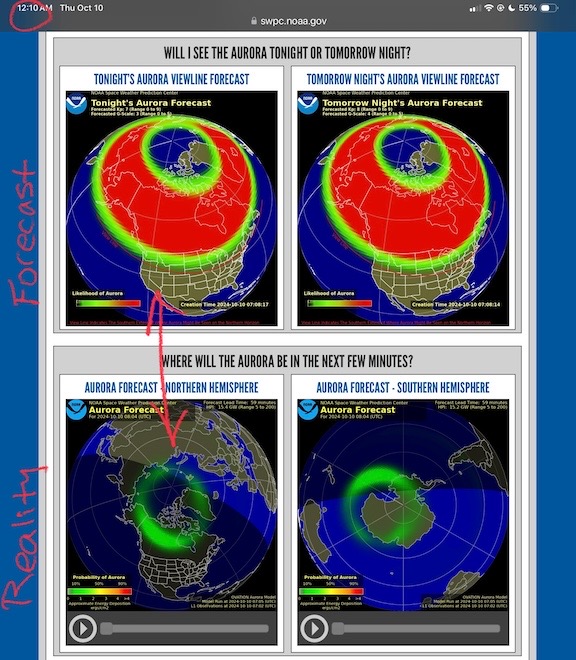
My quest to see the aurora started with the forecasts on the Aurora Dashboard page. Each day, NOAA provides a forecast for tonight and tomorrow night. You can see an example in the top two images in the screen capture below. Like any weather forecast, this is a prediction of what might happen based on data and models. In this particular example, the forecast looked good for two nights in a row.
Aurora Dashboard
In the early morning hours of October 10, the forecast for that night was a lot more optimistic than reality.

I’ve lost a lot of sleep trying to see the aurora. In this example, the forecast told me it should be visible where I live. But this page also provides a very short term forecast for the next 35 minutes. The image on the left is for the northern hemisphere and it painted a truer picture of the situation. The chances of seeing the aurora where I lived was slim. And, of course, I didn’t see it on the night of October 9-10.
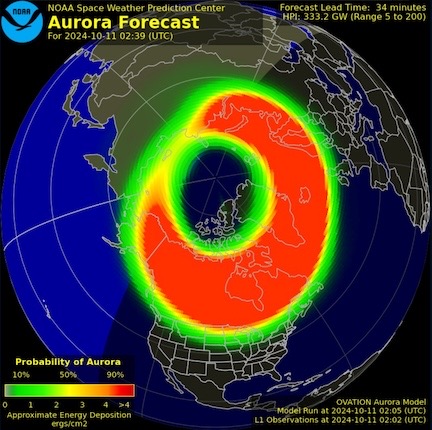
Short Term Forecast
The short term forecast looked a lot better on the night of October 10-11.

But things were different on the night of October 10-11. I knew they were different when my social media feed on Mastodon began filling with aurora photos. I watched the Aurora Dashboard and was rewarded with a very promising short term forecast image. I set up a GoPro pointed mostly at the northern horizon and sky and turned on the night hyperlapse feature. Then I turned off all the lights in my home, including the solar string lights on my deck, and hung out on the deck to watch the sky.

Understand that my home might be 2 miles down a gravel road 10 miles from town, but it has a commanding view of the entire valley, including the brightly lighted cities of Wenatchee and East Wenatchee. This is not a good place for stargazing. No matter how much I tried to get my eyes adjusted to the dark, it simply wasn’t dark. But soon, after a while, I started seeing a reddish glow in the sky. I took a photo with my iPhone 13 Pro — yes, I know it’s time for an update; maybe after Christmas — and was shocked to see auroral streaks of pink lines in the photo.
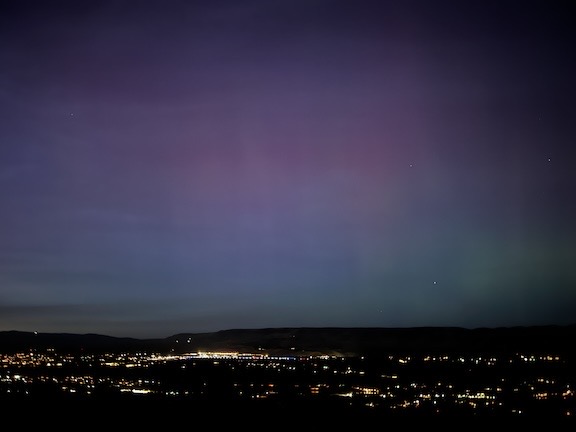
First Aurora Shot
This was the first photo I took from my deck. It was 7:13 PM, less than an hour after sunset.

For the next few hours, I moved from inside my nice warm (but dark) house to outside on my cool deck. I tried hard to see beyond the faint streaks in the sky, but every time I took a photo, the photo revealed far more than I was seeing. It was out there but my eyes just couldn’t take in enough auroral light to see it very well.
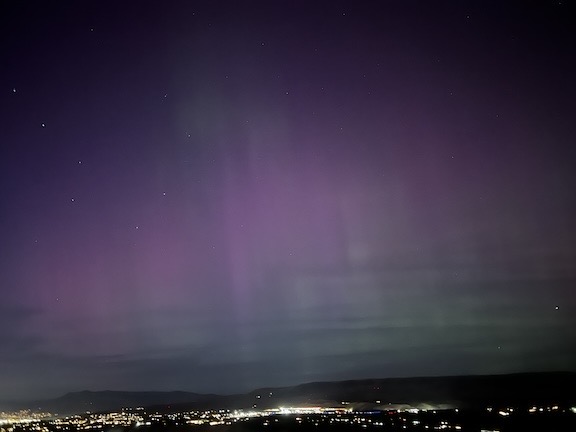
Antoher Aurora Shot
I took this photo a little while later. The predominant colors were a pink and an almost lime green.
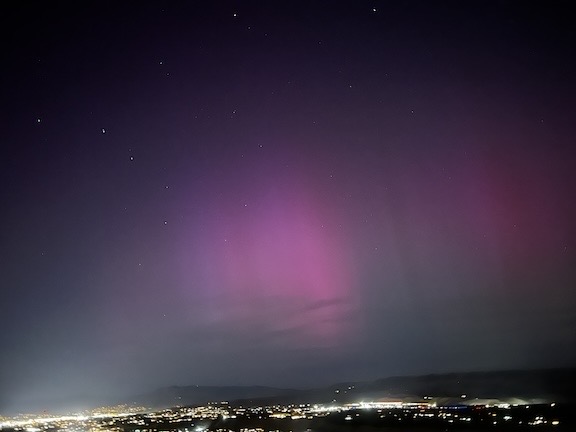
Another Aurora Shot
Here’s another shot from a while later.

It was rewarding but also frustrating. This was probably the first time in my life when I could photograph something better than I could see it. But I wanted to see it! With my eyes!

The sky started to cloud up a little and my frustration got the better of me. After a while, I gave up.

The Video

This was apparently a mistake. I should have tried again around midnight. How do I know this? Well, remember that GoPro I set up? Here’s what it captured before its battery died:

The Next Aurora Viewing

I’m watching the forecast pages closely. The next time we have a strong forecast, I’ll be ready with multiple cameras — including my Nikon, on a tripod — to capture it. But next time, I’ll set up a lounge chair on the deck, snuggle in a sleeping bag, and watch until I can see it better with my own eyes.

My New Telescope

I finally replace my old telescope.

Dobsonian
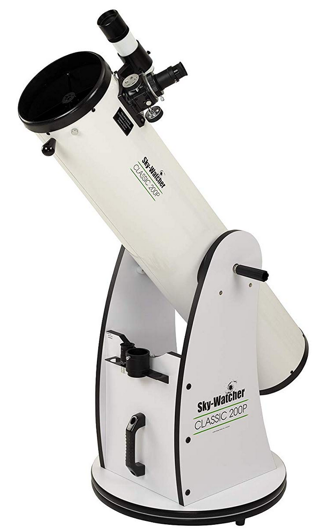
My old telescope looked a lot like this modern knockoff. Meade no longer makes them.

Years and years ago, not long after moving into my Arizona home with my future wasband, I bought an 8″ Dobsonian telescope. We’d seen Jupiter and Saturn through the big telescopes at Lowell Observatory in Flagstaff, AZ and were hooked. The Dobsonian was an affordable, easy to use, and relatively powerful scope, although with hindsight I came to realize it was not the right choice. It had no tracking capabilities, making it a challenge to watch an object for more than a few seconds and making any attempt at photography an utter failure.

The Old Telescope in Washington

I moved the telescope to my new home in Washington when I left Arizona during my crazy divorce. I optimistically set it up in my living room near the door to my big open deck right after the house (and deck) were finished. I think I used it once up there. Too much light pollution from nearby Wenatchee.

Another time, at the request of a friend, I brought it down to the driveway so we could watch a conjunction of Jupiter (or Saturn?) with the moon. The two objects didn’t clear the cliffs behind my house before my friends lost patience and left. I sent the telescope with them so they could experiment with it on their own.

A year or two passed. I realized quite realistically that I’d likely never use the telescope because of the combined problem of local light pollution, difficulty in moving the telescope elsewhere, and the original problem of lack of tracking. So I sold it on Craig’s list. The guy who bought it knew a lot more about it than I did and realized he was getting a good deal. I was just glad to get it out of the corner of my living room.

The New Telescope

Time went by. Light pollution in the Wenatchee area only got worse. I’m still trying to figure out why so many people need floodlights in their yards that shine upwards. (WTF?) Although my street is wonderfully dark with few homes, most of which don’t have floodlights, the ambient light is so bright that the only time my home ever gets dark is when it’s foggy out at night.

Jan's Telescope
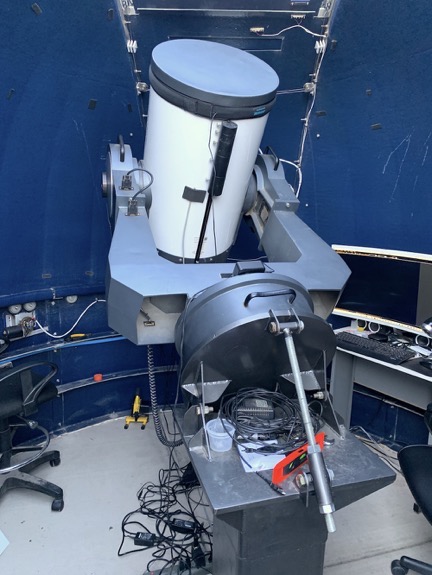
Here’s Jan’s new (to him) 16 inch telescope. He needed some modifications done to his little observatory to get it in there. He uses it for astrophotography and can operate it from a laptop inside his house. Check out his photos here.

But I travelled every winter and spent a lot of time in places with truly dark night skies. I started getting interested in astronomy again.

I also had a friend with an observatory in his backyard. He was extremely knowledgeable about telescopes and, after I accompanied him to look at a 16″ scope to replace his 12″ scope, I asked him to help me find a telescope I could travel with. The main qualification: it had to have computerized tracking.

Jan got right to work and found a nice scope for a good price in the Palm Springs area. Trouble is, I was home in Washington and not prepared to drive all the way down there to see and possibly fetch it. So he held off until I returned to Arizona this winter. I missed his first message with an option and it sold before I followed up. But I was on it for his second lead and wound up buying it.

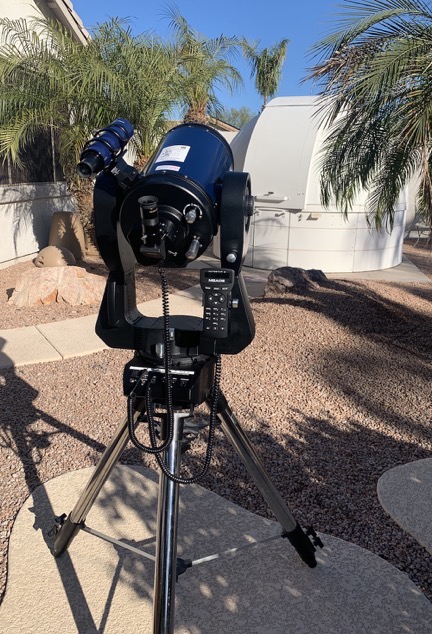
It’s a 2003 Meade LX200 GPS in excellent condition, with tons of eyepieces and a set of filters. After checking it out with its owner, we packed it in its original box and foam, which makes it much safer to transport. It came with everything I needed to use it. And although I’ve since seen them listed for over $1,400 used, I only paid $700 for this one. A good deal.

Working Out the Bugs

Jan very graciously helped me set it back up the first time and showed me how to use it. We immediately ran into difficulties. For some reason, it wouldn’t align properly. I wouldn’t pick up GPS data from the GPS. It wouldn’t find stars and it wouldn’t track them.

I honestly didn’t think the seller had knowingly ripped me off. He had wanted me to come the night before so he could demonstrate it with something to see. I’m a decent judge of people and he did not act as if he was trying to pull a fast one. He even texted me after I left, thanking me and telling me that he hoped I enjoyed it.

New Telescope
Here’s my telescope set up in Jan’s backyard one morning. You can see his observatory beyond it.

We worked on the problems over several consecutive evenings. I was staying at Jan’s house so it was easy. At one point, Jan was convinced that I needed a new AutoStar controller — the device that connects to the telescope and tells it what to do. Replacing the batteries in it didn’t seem to help. Then I asked Jan to use his computer to update the firmware in the controller. He had a PC; I only have Macs. He did that on the third day and that evening we got everything working nearly perfectly. We suspected that the controller had gotten “confused” by sitting idle so long, possibly with bad batteries.

I packed up the telescope and stored it and its box of parts and tripod in Jan’s garage. I was going to Tucson for about a week and had no reason to take it with me since I wouldn’t have time to set it up and use it.

Going Solo

Jan kept telling me to read the manual and I kept trying. It was all a mystery to me so it became an excellent sleep aid while I was in Tucson.

But things changed when I returned from my trip. I fetched the telescope from Jan’s garage and stowed it in my utility trailer. I spent about a week in downtown Wickenburg, where I was showing and selling my jewelry at a big annual Art Show. Then I went off into the desert where I found an excellent campsite for the next 10 days.

One of the things I’d bought for the telescope (and had shipped to Jan’s house) was a lightweight telescope cover. The beauty of living in a desert environment is that there’s usually very little moisture in the air. That means little or no morning dew. And little rain. So I could set up the telescope near my camper, use it at night, cover it up, and not have to worry about it getting damaged during a typical 24-hour period. So I set it up, using the manual — which now had my attention — and got it all ready to use.

Telescope in the Desert
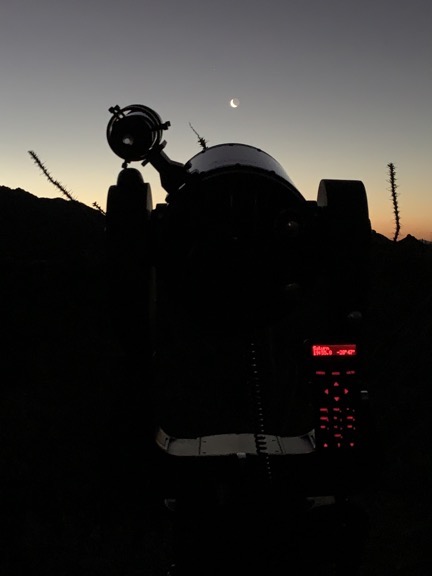
My telescope set up in the desert at my campsite southwest of Vulture Peak near Wickenburg, AZ.

I got it aligned by myself on the second try. The key, I realized, was to use the AutoAlign feature, which automatically figures out where it is, which way it’s pointed, and how it’s angled. All you do is fine-tune its view when it points to two different very bright stars. Once the alignment is done, you can use the AutoStar controller to point to any indexed object. I looked at Venus, the moon (which was a waning crescent at the time), Betelgeuse (which has been in the news a bit lately), the Pleiades, and the Great Nebula. In each instance, I had to adjust the view the controller suggested but, once that was done, the telescope tracked like a dream.

I also started experimenting with a WiFi device I’d bought for the telescope that let me control it with my iPhone using an app called Sky Safari. That made navigating a lot easier. It also gave me access to an “audio tour” of many night sky objects: a narrator’s voice tells you a little about the object you’re looking at enhancing the viewing experience.

I started playing with eyepieces that would change the magnification and field of view of the telescope. I had eight eyepieces, many of which looked as if they’d never been used. I discovered that stronger magnifications worked great on objects high in the sky but were too blurry for items near the horizon. Too much heat coming off the ground, making waves in the air.

I got to know a group of four people with a dog who hiked past my campsite every evening. One evening, they saw me messing with the telescope and I invited them to come back later to do some star gazing. They returned when it was fully dark and I showed them the same things I’d seen (except the moon, which was no longer in the night sky), along with some double stars and the Andromeda galaxy. This is something I never would have been able to do with the old Dobsonian because I’d have to keep re-finding the object every minute or so. They were suitably wowed.

Telescope at Dawn
Dawn was in the same direction as the glow from Phoenix, so I didn’t do much observing in that direction, but I did manage to catch sight of a waxing crescent moon, with Mars, Jupiter, and Saturn all lined up in the morning sky.

I learned that the moon, Mars, Jupiter, and Saturn were in the early morning sky, just above the horizon at sunrise. I woke on a morning with an absolutely clear view to the southeast and managed to align the telescope before it got too light to see anything. I saw four moons around Jupiter and Saturn with its rings. Mars was a reddish blur.

During this time, I watched the weather carefully. When rain appeared in the forecast, I disassembled the telescope and put it away for the rest of my stay at that site.

Beyond the Basics

Accessory Box
Here’s the nearly finished setup for my telescope accessories. After shooting this photo I found yet another eyepiece and added it with the others. There are two layers of foam; I have to lift the top layer to get to items beneath it.

Because I didn’t like the idea of having two separate boxes for carrying around the eyepieces and other accessories needed to run the telescope, I invested $50 at Harbor Freight on a waterproof case with foam insert. I spent about an hour laying out all the accessories and cutting the foam to fit it all in. This freed up the fancy padded Meade box that the eyepieces lived in and made a more secure storage area for the spotting scope and other more delicate items. Now I have just three things to tote around: the telescope in its original padded box, the tripod (which I may make a bag for), and this new box.

I’d like to get a similar case for the telescope itself. Jan has a canvas one that fits the foam for his similar 8″ telescope, but I prefer a hard case with wheels. Still, I’m not interested in spending $400+ to buy one and to have the added weight to tote around. We’ll see what I find without looking too hard.

I also bought an external battery at Harbor Freight. Designed to jump start a car, it also has 12 volt receptacles and USB ports. The telescope came with a DC power cable so it could be used without batteries; the previous owner said he used to plug it into his car when he was using it away from home. I bought a cable that converts that to something that could be plugged into a wall so I could use it with any common power source. Otherwise, it needs 8 C batteries, which I’d hate to burn through.

The Verdict

Although I wish the telescope was smaller and lighter — the tripod weighs about 30 pounds and the telescope weighs about 40 pounds — I can’t complain about the optics, operation, or view. It’s the telescope I wish I’d bought back in the late 1990s when I first moved to Arizona and got to enjoy dark skies. It fits fine in the back seat area of my truck or in my little cargo trailer. I can easily imagine taking it on camping trips or on nighttime outings with friends.

As my winter travels wind to an end, I expect to set it up in at least two more places: the desert at Borrego Springs, where I can share views with my good friend Janet before we part ways until next winter, and possibly Death Valley National Park, where I might detour just to check out the night skies. Next year, it’ll be part of my travel gear again.

Typical Late Autumn Weather Time-Lapse

Lots of fog coming and going all day long.

I knew when I woke up yesterday morning that it was going to be a foggy day. How could I tell? I looked out my window and didn’t see a single light anywhere. The fog was all around me, blocking out the thousands of lights down in Wenatchee that keep my home from getting dark at night as well as closer in lights in at my neighbors’ homes. It was pitch black dark.

But with fog and low clouds moving around, it would be a good day for a time-lapse.

The Equipment

I went down into the garage and rummaged around in a box full of old camera equipment until I found my Canon PowerShot G5. This was my first “serious” digital camera, which I bought back at the end of 2003 for aerial photography. (Back then, I had the crazy idea that my future wasband was capable of taking satisfactory photos from the helicopter to meet the needs of aerial photo clients. That turned out to be a very expensive exercise in futility.) With 5 megapixel resolution, it was a big deal — all my digital cameras up to that point had shot in 2.1 megapixels or less. I even took it with me to Supai, the Havasupai village at the bottom of the Grand Canyon, when I went on an Arizona Highways photo excursion in April 2004.

So yes, the camera is old. At least by today’s standards.

But I don’t throw anything useful away. Even when I got better digital cameras — like the Nikon D80 I bought in 2007 and the Nikon D7000 I use now — I kept the old Canon.

Years ago, I bought a Pclix intervalometer for it and started using it as a dedicated time-lapse camera. An intervalometer, in case you don’t know, is a device or camera feature that tells the camera to shoot an image periodically per your specifications. That and a tripod are the two things you need to make time-lapse movie images. You then use an app on your computer (or smartphone, I suppose) to compile those images into a movie.

G5 and Pclix
Shown here: my Canon G5 with optical cable taped on, Pclix intervalometer, and the power supply for the camera, which is not USB.

The Pclix I have uses an optical trigger mechanism. That means it sends a beam of light down a fiberoptic cable. The light is seen by the old Canon G5 as if I’ve pointed a remote at it and it clicks the shutter. To get this to work, I used electrical tape to attach the business end of the optical cable to the G5’s remote sensor. Of course, the camera needs to be plugged into power — its old battery won’t hold a charge and, even if it did, it wouldn’t last all day. The Pclix runs on a pair of AAA batteries and I was very surprised to see that they still had enough juice to power it. But I guess an electronic timer and tiny beam of light don’t need much power.

When I dug out all this stuff yesterday morning, I was kind of surprised to find it all. (Note to self: putting things away really is a great strategy for making them easy to find in the future.) Although I still do time-lapses once in a while, I’ve been using my GoPro, which is a lot more compact and easy to set up. But my GoPros and my Nikon D7000, which has a built-in intervalometer, are all in Arizona, waiting for me to join them. The G5 was my only option.

Setting Up

I’ve always been interested in time-lapse movies. There’s nothing quite like them to show the movement of slow-moving things. You can see the ones on this blog by checking out the time-lapse tag.

Of course, the challenge is to set up a time-lapse camera before something interesting happens. I can’t tell you how many times I’ve tried to create a time-lapse of clouds on days that clouds never made an appearance. The good thing is, the images are all digital, so if a whole day shooting results in a dull time-lapse, I can just delete it all.

Yesterday’s challenge was pointing the camera in the right direction with the right zoom magnification. (This is one of the benefits of using the G5 instead of a GoPro: optical zoom.) It was barely light out and the fog was thick when I got it all set up. I was also concerned about focus; I let the camera’s autofocus feature take care of that, but when there’s no detail to lock in on, the camera can’t focus. So I suspect there are some focus issues with individual shots.

I let it run all day from the corner of my deck, plugged into one of the outlets there, with 1 shot every 15 seconds. That’s how the Pclix was set up. I’d lost the instructions and didn’t want to mess with reprogramming it.

The Results

I checked on the camera at about 3:30 PM and discovered that its tripod had fallen over. Oops. I brought it in and saw that the last shot taken was after 2 PM, so I did get most of the day.

I brought the camera up to my loft where my office is now. It took a while to find a cable that would connect the old camera to my computer — I knew there was no chance I’d find a card reader for the Compact Flash card (which isn’t compact at all by today’s standards). I worked some magic and got the images into my computer.

Then I ran them through an app that resized them and put the time in the corner.

Then I fired up QuickTime 7 Pro — which I’ve always used for time-lapses — and created a movie with 30 frames per second. So each second of this movie is 7-1/2 minutes of the day. Here it is:

What surprises me most is just how much of the day was foggy. Keep in mind that my home sits on a shelf about 800 feet above the river. In the winter, we often get inversions that fill the valley with fog. Sometimes I’m above it, sometimes I’m in it, and sometimes I’m below it. Yesterday, I was mostly in it and above it. At one point, I looked out my office window, which faces south towards the cliffs, and it was perfectly clear. Yet at the same time, the view through the camera was nearly completely fogged in.

Of course, this has motivated me to do some more time-lapses. Maybe I’ll produce a few in Arizona when I head down there for the winter. But I think I’ll leave my clunky G5 setup home.